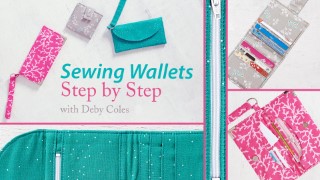
Sewing Wallets: Step by Step
Sewing your own wallet is easier than you think! Learn to sew durable, professional-looking wallets as So Sew Easy blog contributor Deby Coles guides you..
Class Preview
Sewing your own wallet is easier than you think! Learn to sew durable, professional-looking wallets as So Sew Easy blog contributor Deby Coles guides you step by step through three classic styles.
Super Simple Wallet: Exterior
Meet Deby Coles and start class by discussing how to choose the right fabric and interfacing for your first wallet. Learn how to prepare the outer piece and closing strap, and how to install a plastic snap closure.
Super Simple Wallet: Interior
Follow along as Deby guides you step by step to construct and install interior pockets. Finish your wallet by matching up your outer panel and stitching it all together.
Pop to the Shops: Interior
Expand on what you learned in Lessons 1 and 2 and create a wallet with a double-sided card pocket. Deby first shares how to easily construct and install a zippered pocket, then moves on to basting and preparing the inside of your Pop to the Shops wallet.
Pop to the Shops: Exterior
Learn to install two styles of wrist straps: permanent and removable. You’ll prepare your exterior wallet piece with padding for added security, and install a traditional magnetic closure for a secure and professional finish.
Assembling Pop to the Shops
Customize your double-sided wallet by adding decorative metal corners. You’ll see how to match up the inner lining and outer pieces to fully assemble this handy and fashionable accessory.
Fold-Up Wallet
To end class, build on the previous lessons and make a tri-fold wallet with an invisible magnetic closure. You’ll see how to mix and match Deby’s techniques to create a variety of unique styles for any occasion.
User Reviews
Be the first to review “Sewing Wallets: Step by Step”
You must be logged in to post a review.


There are no reviews yet.