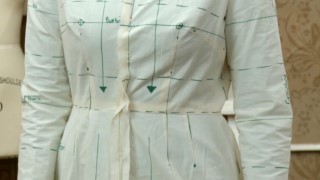
Fast-Track Fitting
Designer Joi Mahon shows how to measure yourself and alter a pattern before you sew a stitch. Save time and fabric by getting your fitting done first…
Class Preview
Designer Joi Mahon shows how to measure yourself and alter a pattern before you sew a stitch. Save time and fabric by getting your fitting done first! Note: Pattern not included.
Measurement & Fit Basics
Meet your instructor, Joi Mahon, learn about the pattern you’ll be using, key measurement basics and measuring protocol.
Measuring the Torso
Begin by measuring the torso, taking key horizontal and vertical measurements to transfer to your pattern.
Vertical Torso Adjustments
Armed with the measurements you need, you’ll make adjustments to your paper pattern for the perfect fit through the bust. Joi will show how to alter the lines of your pattern both front and back to get the curves just right.
Horizontal Torso Adjustments
Your pattern will fit you to a “T” across the bust, back and middle after you make your horizontal adjustments with Joi’s guidance.
Measuring the Lower Body
Get all the key measurements for the lower body, including waist, hips and abdomen.
Vertical Lower Body Measurements
Make your garments longer or shorter in all the key areas by adding to or subtracting from your pattern. Joi shows you how!
Horizontal Lower Body Measurements
Get the perfect fit in waist, abdomen and hip by letting out or taking in your pattern pieces.
Measuring the Arm
If you’re particular about the fit and length of your sleeves, you’ll be pleased to learn how to get the measurements you’ll need to adjust your pattern to your liking.
The Sleeve Pattern
Take those arm measurements and get the perfect fit on your sleeves!
The Final Fit
Now that your pattern is adjusted on paper, it’s time to sew up a muslin and tweak the final fit. Once you’ve transferred those last adjustments back to the pattern, you’ll have a master template from which to design your own perfectly fitting garments!


There are no reviews yet.