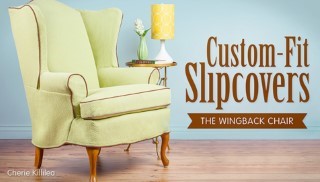
Custom-Fit Slipcovers: The Wingback Chair
Give your furniture a facelift as you learn to drape, fit and sew custom slipcovers that will hug the unique humps and curves of your wingback chair!
Class Preview
Give your furniture a facelift as you learn to drape, fit and sew custom slipcovers that will hug the unique humps and curves of your wingback chair!
Preparing the Chair for Slipcovering
Meet your instructor, sewing maven and pattern writer Cherie Killilea. Cherie kicks off the class with a fun introduction to the basics of creating a slipcover, starting with ways to assess your chair and how to apply her methods to the unique furniture in your home. Add extra batting where it’s needed, repair damage like rips and lumps, and select the fabric that will be the best equipped to bring your chair back to life.
Creating Patterns & Measuring
Learn how to draft your own pattern pieces, and how to determine which areas of your chair will need patterns. Discover the best ways to measure tricky spots like bumps, corners and extra-full padding so you can make an educated yardage estimate. Next, trace your pattern pieces using Cherie’s helpful tips, and label them to make cutting and sewing as easy and efficient as possible.
Creating the Back Unit
Begin the construction process by creating the back unit of your slipcover. If your chair tapers in the back, Cheri shows you how to install an invisible zipper (or two) that will keep the slipcover on snugly. Next, learn the best ways to measure and attach a beautiful welt cord that will make your slipcover look like professional upholstery.
The Inside Wings
Start fitting the inside of the chair as you learn how to sew straight pieces onto curved pieces. Cherie demonstrates how to connect the gusset to the curve of the chair wings before sharing step-by-step tips for fitting the back and wing pieces and sewing the inside wings and gussets. Discover easy, time-saving techniques that will help you pin and align your fabric pairs, sparing you from frustration as you sew and fit your slipcover later.
The Arms
Attach the curved scrolls at the end of the arms to the inside and outside pieces, testing the construction along the way to ensure a snug fit. Cherie demonstrates the best ways to merge the arms to the wings, taking cushion fullness and seam allowances into consideration as you work. Pieces of various lengths and sizes will start coming together as you carefully fit, pin and sew around straight and curved pieces alike.
The Back, Deck & Apron
Tackle the three largest sections that don’t require a pattern: the inside back, the deck and the chair’s apron. Cherie shows you how to create precise lines that fit snugly into the gaps between cushions and support pieces, and shares ideas for creating a fun pop of color with a vibrant deck fabric. Complete the look with a crisp hem treatment below the apron.
The Cushion
Don’t forget the best part: the cushion! This piece will come together quickly as you employ your new and improved skills to draft a pattern and fit a muslin to your cushion. Cherie breaks down challenging issues like T-shapes and accounting for asymmetrical areas as she demonstrates methods for attaching an overlapping welt cord and installing a zipper in the back gusset. You’ll be amazed at how chic and professional your finished, custom-made slipcover will look!
User Reviews
Be the first to review “Custom-Fit Slipcovers: The Wingback Chair”
You must be logged in to post a review.


There are no reviews yet.