Multi-Axis Woodturning: Creating a Vessel

Elevate your woodworking repertoire with essential woodturning techniques and create a stunning multi-axis vessel you’ll be proud to show off!
Class Preview
Elevate your woodworking repertoire with essential woodturning techniques and create a stunning multi-axis vessel you’ll be proud to show off!
Introduction & Getting Started
Meet your instructor, Michael Roper, and get started making your own vessel with an offset opening. First, Michael will show you how to measure for center and how to create an offset, which you’ll use when hollowing out your vessel. Then he’ll demonstrate how to round the blank and make the first shaping cuts, offering tips about tools and lathe speeds along the way.
Mounting the Second Axis
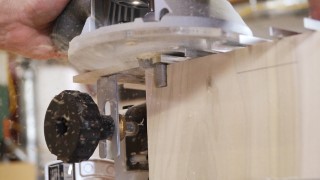
Learn how to mount your vessel on its offset axis and create an off-axis tenon, which will be used later to stabilize your vessel as you hollow it out. Gain confidence as you master the tricky air cut, and learn how to measure and dovetail the tenon to snugly fit into a four-jaw chuck. Finally, Michael shares safety tips and advice for securely mounting your vessel into the chuck.
Beginning to Hollow
Create a hollowing channel using a drill bit, then start on the dramatic architectural feature of the vessel neck. Learn how to properly prepare your tools and gently make cuts so you take just a little wood off at a time. Finally, Michael introduces you to a tool that will cut down on your sanding time by removing large tool marks immediately.
Hollowing Techniques
Discover which tools give you the best results for hollowing and then go inside the vessel as you hollow out the bulk. Then, Michael will show you how to use a bent cutter to create your vessel walls and offer you invaluable tips for approaching the wall with confidence. Learn a simple trick for making a homemade caliper to help you measure your wall thickness so that you never break through.
Creating a Reverse Jam Chuck
Now that the top of your vessel has been created, it’s time to focus on the bottom. And for that, you’ll need to make a reverse jam chuck, which you can customize to accommodate the neck of your piece. Learn how to measure and mark your blank for a precise fit. Then, Michael shows you time-saving techniques for hollowing out the top of your chuck. Finally, see how to make your final chuck cuts and attach your vessel for a snug fit.
Finishing Your Vessel
Make the final cuts on your vessel as you shape the bottom, learning to taper your piece to just a 1-inch circumference. Blend your cuts and sand the piece while it’s still on the lathe. Learn Michael’s technique for ensuring the vessel sits flat before you make the final cut of this class, this one by hand, as you remove the nub with a chisel.
Round Bottom Variation
Stretch your multi-axis skills and artistic vision even further as you discover how a few simple technique adjustments will allow you to create a smaller vessel with a rounded bottom. You’ll get advice on how to measure, shape and cut your vessel and how to alter your methods on this shorter piece. Once your shaping is complete, Michael shows you an easy way to secure your vessel to the reverse jam chuck so that you can create a perfectly round bottom while the piece is still spinning.
User Reviews
Be the first to review “Multi-Axis Woodturning: Creating a Vessel”
You must be logged in to post a review.


There are no reviews yet.