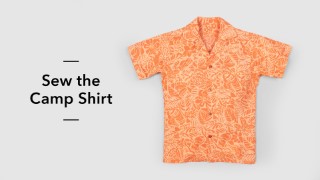
Sew the Camp Shirt
Ready to take your stitches up a notch? Learn to sew a classic camp shirt, a breezy short-sleeved button-up that’s perfect for warmer weather. Expert sewist Peter Lappin shows you how, step by step.
Class Preview
Ready to take your stitches up a notch? Learn to sew a classic camp shirt, a breezy short-sleeved button-up that’s perfect for warmer weather. Expert sewist Peter Lappin shows you how, step by step.
Getting Started
Learn all about the style known as the camp shirt, then learn about fabric and pattern choices (including vintage patterns), and tips for matching prints at the center front, a sign of a well-made shirt!
Front & Back
You’re ready to sew! Start your shirt by interfacing and finishing the edges of the front facings. Then form and stitch pleats for easy wearing in the back, and construct the pocket to attach later.
Yokes & Shoulder Seams
Next, see how to quickly attach the yokes to the back and front of your shirt using the popular burrito method. Add an optional button loop at the neck for a convertible collar that you can wear open or closed.
Sleeves & Side Seams
Easily insert the sleeves with a flat insertion method, then sew the sides of the sleeve and shirt in one step and complete it with a classic flat-felled seam finish. Afterwards, finish the lower edges of the sleeves with a neat hem or faux-cuff treatment.
Collar & Neckline Finishing
With the sleeves attached and side seams complete, it’s really starting to look like a shirt! Learn how to precisely stitch and press the shirt collar. Then attach it to the neckline and facings with Peter’s pro tips.
Pocket, Hem & Finishing Details
Your shirt is almost done! All that’s left is to attach the pocket and finish the lower edge with a narrow hem. Add buttonholes based on your machine instructions, sew on buttons, and you’re done!


There are no reviews yet.