Startup Library: Sewing
Everything you need to sew with confidence. Note: Pattern not included.
Class Preview
Everything you need to sew with confidence. Note: Pattern not included.
What You Need: Essentials
Meet author, designer and sewing expert Sara Alm and begin class by going over a few essential tools, including a sewing machine, good fabric shears and an iron.
What You Need: Patterns
Sara shows you how to select the perfect beginner-friendly sewing pattern, measure for your correct size and, using McCall’s dress pattern 7120 (not included with your class), read a paper pattern envelope. She’ll also discuss the pros and cons of downloadable PDF patterns.
What You Need: Fabrics
Find out how to buy fabric like a pro! In this lesson, Sara shares the best types of fabrics to use for beginners, as well as the more challenging ones, before explaining how fabric is measured in width and length.
What You Need: Interfacing
Underneath it all, interfacing supports fabric and keeps it stable in areas such as necklines and armholes. With so many varieties to choose from, Sara helps you drill down to just what you need. She even shares tips for successfully adhering fusible interfacing to fabric with a steam iron, an essential sewing skill.
What You Need: Notions
See how to choose thread and other essential smaller tools, including pins, needles and a seam ripper. Sara also covers twill tape for tote bag handles, and other trims and closures you might find useful as you continue to sew.
Practice: Machine Threading & Operating
Ready to start operating your sewing machine? First, wind a bobbin, thread the machine, load the bobbin, insert a needle and attach a presser foot. Then, select a straight stitch, set the stitch length, and let ‘er run as you practice stitching straight lines, pivots, curves and backstitching on no-risk paper.
Practice: Stitches & Seams
Learn to pin, sew and press accurate, beautiful seams as Sara explains seam allowance, an essential concept for successful sewing. You’ll also learn three options for easily finishing the raw edges of the seam allowance. And if you make a mistake, not to worry! You’ll learn how to use a seam ripper to remove errors.
Method: Grain Line & Pattern Layout
Once you’ve pretreated your fabric, you’re ready to lay out the pattern pieces on the fabric for cutting, arranging them for the most efficient use of your cloth. Sara walks you through reading the pattern layout diagrams and aligning the all-important grain line, found on each pattern piece.
Method: Cutting & Marking
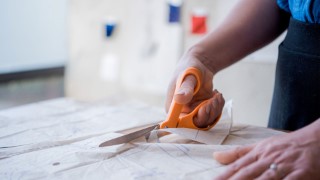
It’s important to cut the pattern pieces out smoothly and accurately. Using the tote bag class project as an example, Sara shows you how to cut with fabric shears. Then discover various techniques to trace the dart markings and transfer other key symbols from the pattern to the fabric.
Make It: Tote Bag Part 1
Now, put your newly learned techniques to use by sewing your first project: a tote bag! After a quick recap of the cutting and marking process, start your bag by preparing and stitching the pocket to the front. Then add shaping to the bottom of the front and back with darts.
Make It: Tote Bag Part 2
Complete your tote bag by sewing the front and back together using the “right sides together” sewing rule. After that, turn and topstitch the raw edge and add the straps. Sara even throws in a couple of fun variations for you to try!
Make It: Easy Dress: Working With the Pattern
Build on your stitching skills by sewing your first garment: an easy scoop-neck dress with shaped hem. Sara discusses pattern vocabulary, pattern layouts, how to select the pieces you need, customize a multi-size pattern, and how and why you may want to trace the pattern pieces onto fresh paper before moving on.
Make It: Easy Dress: Darts, Shoulder Seams & Neckline Facing
Continue working on your dress as Sara reviews the construction process and gets you started sewing bust darts and shoulder seams. Next, you’ll prepare the neckline facing by sewing its shoulder seams and clean-finishing the edge.
Make It: Easy Dress: Attaching the Neckline Facing
Give your dress a professional look by creating a well-sewn facing, or finished edge turned to the inside. Follow Sara’s step-by-step instructions to stitch the prepared neckline facing to the dress, trim and clip the seam, and understitch it before securing the facing to the shoulder seams with a few hand stitches.
Make It: Easy Dress: Side Seams, Pockets & Armhole Facings
Side-seam pockets are easy to add when you’ve transferred the markings accurately. After stitching the pockets to the front and back of your dress, stitch the side seams, finish the seams, and press them. Afterwards, sew the armhole facings to the dress with the methods you learned in the previous lesson, and you’re almost done!
Make It: Easy Dress: Hem & Belt
Complete your dress by machine sewing a shaped narrow hem. Sara will guide you through accurate preparation, stitching and pressing for terrific results, as well as show you how to hand-stitch a hem for future projects. Then complete your dress with a fabric belt using Sara’s easy method.
What’s Next: Future Projects & Zipper How-To
Sara ends class by offering some ideas for future projects. Then relax and watch as she demonstrates inserting a center slot zipper to help you tackle your next project, whether a skirt or dress, with confidence!
User Reviews
Be the first to review “Startup Library: Sewing”
You must be logged in to post a review.


There are no reviews yet.