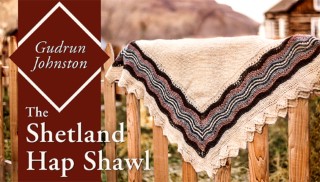
The Shetland Hap Shawl
Knit an unforgettable Shetland shawl! Create a timeless accessory with the features that set this storied knitting style apart from others.
Class Preview
Knit an unforgettable Shetland shawl! Create a timeless accessory with the features that set this storied knitting style apart from others.
Overview & Getting Started
Meet designer Gudrun Johnston, a native of the Shetland Islands, and learn more about the history of Shetland haps, or square shawls. Gudrun discusses needle, yarn and color choices and gets you started with the shawl’s two-stitch cast-on and garter-stitch center. Knit along with Gudrun on a mini-hap, cast on for the full hap or try the triangular half-hap.
Working the Center
Gudrun explains the hap’s construction and shows how to make the decreases to turn your triangular center into a square. When you’re back to two stitches on your needles, you’ll count the yarn overs along your edges to make sure you’re all set to knit the lace border.
Preparing to Knit the Border
With Gudrun’s guidance, you’ll pick up the yarn overs around the edges of your center on circular needles, then knit setup rounds for the “old shale” lace border, a type of feather-and-fan lace. Gudrun explains how to read the lace chart (written instructions for the lace are included in the pattern, too).
Knitting the Lace Border
The hap’s simple, repetitive lace pattern is easy to knit. Gudrun shows how to change colors at the beginning of your rounds and how to use markers to keep track of your repetitions. You’ll make decreases on your last row to prepare for adding edging.
Working the Applied Edging
The hap’s edging is knitted sideways with the help of a double-pointed needle and attached to the shawl on every other row. That might sound complicated, but Gudrun will walk you through the process step by step.
Finishing & Blocking
Finishing your hap is as simple as weaving in ends and sewing up the short sides of your edging. Then you’re ready to wet-block your project and lay it out on a flat surface with wires or pins. Your hap will soon be ready to be worn and admired!
The Half-Hap Shawl
If you choose to make the triangular half-hap rather than the full hap, there are a few changes in the way you’ll knit the center, lace border and edging. Gudrun guides you through!
User Reviews
Be the first to review “The Shetland Hap Shawl”
You must be logged in to post a review.


There are no reviews yet.